Friday, November 30, 2012
I have often been asked how I came by the name Old Bear Woodcarving. Some may believe it's because bear are favorite subject to carve, but far from it. Actually my wonderful wife of forty two years deserves the credit for that. One day I was working on her honey do list which was half as long as my leg. All the while I was slaving away for her I was also complaining that I had a carving in the works that I would never get to. After listening to me whine long enough she finally said "well then just go carve, you old bear". So that's how, many years and carvings ago the name Old Bear Woodcarving was born.
Wednesday, November 28, 2012


Thursday, November 15, 2012
Here's a simple little carving that was completely out of the blue. One of those where I just start carving with nothing special in mind. I've found in the past this helps me get rid of my "carvers block." Just carve with nothing in mind and be happy with whatever you end up with. LOL, sometimes all I end up with is a pile of wood chips, but at least I'm carving.


Monday, November 12, 2012
Well once again it's been a while since my last post. Still not carving as much as I would like, but I am working my way out of the funk I'm in. Here is my latest carving. Hope you enjoy.


 Mrs Claus and her rocker are made from one piece of wood, and she is not attached to the base so she can rock while she knits. She is available for purchase at : http://www.etsy.com/shop/OldBearWoodcarving


Tuesday, October 23, 2012
Hello again, I have been suffering from a serious condition called carvers block. For the past three weeks nothing I have started to carve is finished or I make a mistake bad enough to scrap it. I've been in these funks before but never this long. To work my way out of it I started a clay model of a bear I want to carve. Let's see if this will get me back on track.


Finished.
What I am hoping to do is just work out the basic design and not worry too much about any detail. I may add some eyes to the model, as that is one thing I am struggling with right now. Have never built a clay model before usually just carve it, but deperate times as they say. We'll see how this works out.
Thursday, October 18, 2012
Been a while so here goes. The moose project is on hold due to another large knot found in the wood once I got to carving on it. Put it on the shelf to give me some time to think about either fixing it or starting over. I harvested the wood myself so no complaints' it was all free.
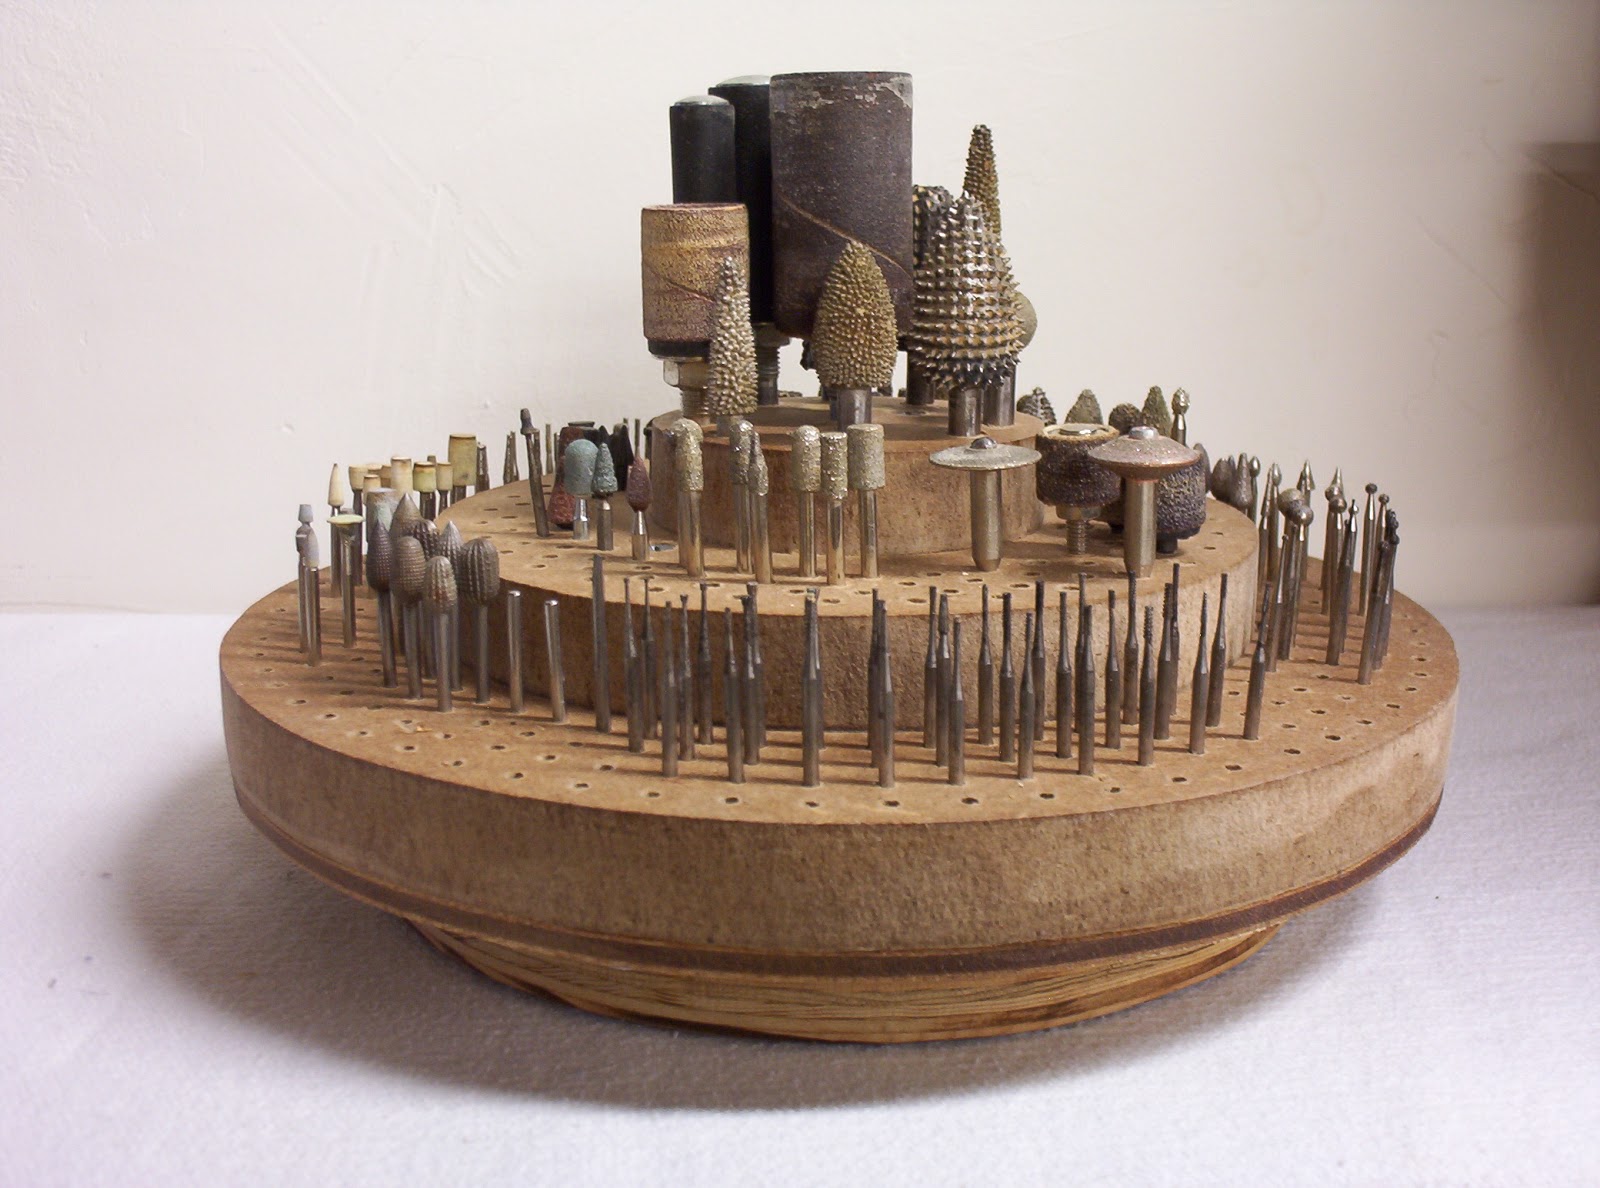
Have been busy though, the Christmas ornaments are all sent out, people have started getting them and I have started another project. I did build myself a holder for my power carving bits. I looked for a premade one and of cousre couldn't find what I wanted so I just made one. I had made two others for my piants so just followed the same basic design.

 It ain't pretty but it does the job and still gives me room for some extra bits. Cost $3.99 for the turn table and the rest is scrap MDF left over from a speaker box. About an hour to build and the finish is just several coats of thinned poly. You know what they say about necessity being the mother of invention. Not only that I'm cheap too, why buy if I can build it for little or nothing.

Saturday, October 6, 2012
It's been a while since my last post so thought I better say something. Been busy, busy, busy. I am in a Christmas ornament exchange and just finished up with them and due to ship out this coming week. Sorry I can't show a picture don't want to ruin it for those who may stop by here. Have been working on the base for the polar bear but just can't seem to get the look I'm after. Just have to keep experimenting. I have also decided it's time to finish up my moose I started a while back. I carved just a head a while back and now it's time for the whole moose. Will try to post up some pics shortly. Thanks for stopping by.
Friday, September 21, 2012
Now that I have one eye to my liking I can start working the other. Here's where it gets tricky. Making one eye look the way I want is easy making them both look the same, not so easy. At least not for me. No matter how many eyes I set it still can take me upwards of two hours or better to get them right. But then again if they aren't right the rest of the carving won't be either. For each carving I do I am looking for a specific "look" not only in the pose but also in the eyes.
In the first picture I have added a gob of putty to the other eye and will begin to work it in.
 Now we have the finished results. Both eyes look the same, have the look I wanted and it only took me about two hour for both eyes.

Now we can talk a little about the highly sophisticated and technological tools I use for setting eyes. You've already seen the bit I use for drilling my pilot holes, now for the rest.
 The top two are alignment tools I made from a couple of old upholsetry needles. The work great for aligning the eyes, just put the tools at the top, bottom or the front of the eyes to see if the are aligned as below
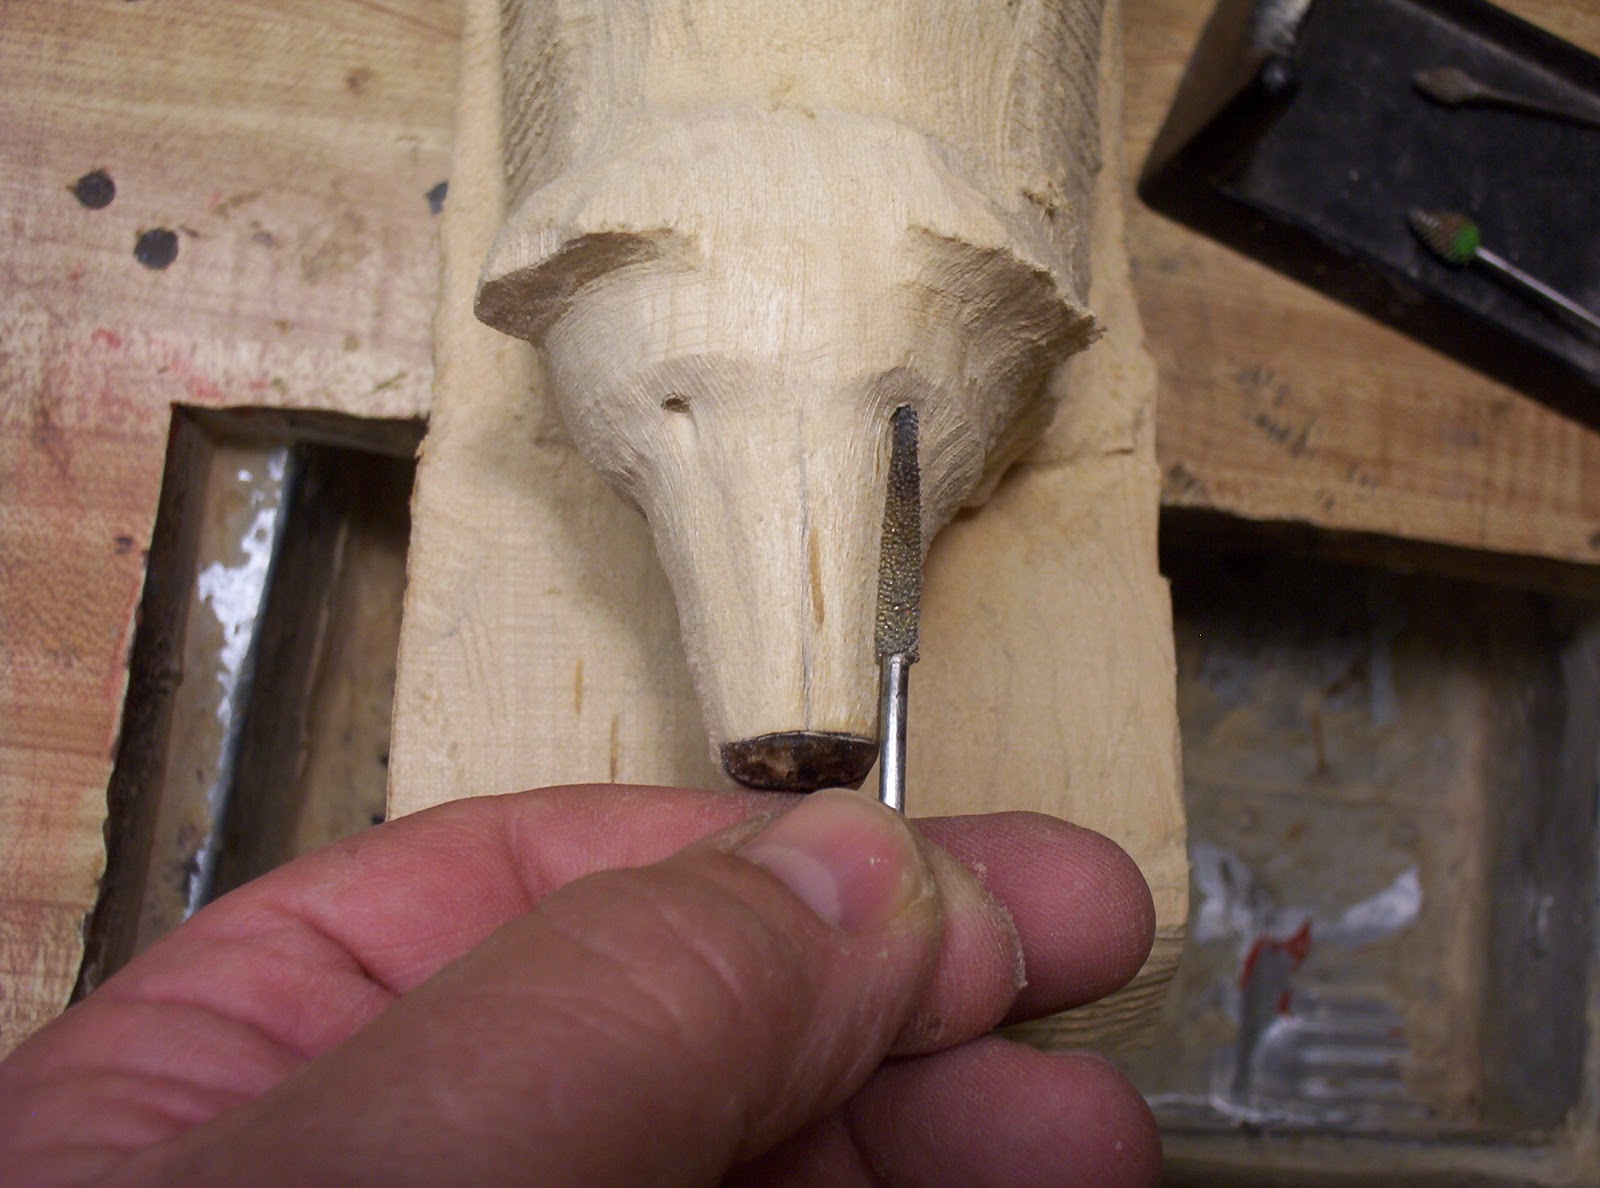
The other tools are simply different size carving bits I use to enlarge the eye socket. I try to pick one that is as close to or slightly over the size of the eyes. I will grind out the pilot hole until I have the depth that I want.
In the first picture I have added a gob of putty to the other eye and will begin to work it in.

 |
| Here we have the eyes completed |

 |
| As you can see here the left eye needs some more work. I will now work this one with some carving bits to further refine it. |

 |
| Here I can see the tools are straight across from each other and by looking from the end I can tell if they are in line that way. |
Now that I have refined the area around the eyes and the sockets are the proper depth I can glue the eyes in place. I put the eyes in and then put a few drops of super glue at the top of each eye. I let it run down behind the eyes and the eyes are now glued in place. I then use the wood putty to form the area around the eyes and the lids. I work one eye until I get the look I want then let it dry. Once dry I work the other eye to get it to look the same as the first.


 Here you can see the eyes are glued in place. The darker area above the eyes is the super glue.
 In this picture I have applied a gob of the wood putty and will start working it to form the upper and lower eye lids.
 This is the wood putty I use when setting the eyes. I get it a local building supply store. They do not carry the solvent or thinner anymore, but I have found acetone works just as good. One thing I have found with the putty is that the more you work it with the thinner the stronger it seems to get. I use a small medium stiff paint brush to work the putty and form the lids. I just dip the brush in the thinner and continue to move and work the putty until I get it where I want it. The biggest advantage, in my opinion, to using this putty is even after a few days I can still make adjustments if needed on the eyes. Also if I happen to damage an eye and need to replace it removal is easy, just keep the eyes area wet with thinner until the putty softens enough to pop the eye out. Again maybe not the right way or the best way, but it's how I set the eyes.
Next time, making the eye lids and getting the look I want for the carving.


Next time, making the eye lids and getting the look I want for the carving.
Thursday, September 20, 2012
Well I am finally back on track with the new polar bear. When I made the cutout, the head was out of proportion to the rest of the body. So I made the head smaller which is more is tune to the size carving I want. I have the nose carved in again and can now start laying out the eyes. In the pictures I have drawn in the eyes. By drawing in the eyes I can also see if I need to make any minor changes to area aroung the eyes. To me they aren't quite right, so once again I will keep drawing and erasing them until I get it right. Yup, I buy my pencils by the box. LOL
In the last picture I am satisfied with the eyes drawn in and have carved in the eye sockets.


 Now lets talk a little about the eyes, predators have eyes that are facing forward, in other words they can see the tip of their nose easily with both eyes. Prey animals have eyes that are more on the side of their head. Remember the old saying from eighth grade biology. Eyes in the front so I can hunt, eyes on the side so I can hide. As you can see the eyes are forward facing so he can hunt. Another hint on the eyes is that like humans, mammals eyes have a slight downward slant. It's hard to see here but the area directly under the eyes is carved in just bit more than the top. I don't get too carried away with it because I will make up the difference with putty when I set the eyes. I use glass eyes for all my animal carvings. I buy standard grade dark brown eyes in various sizes, I can then use them for all the bears, moose or elk I carve.


 In the pictures here I am happy with my eye placement and have predrilled a small guide hole in the sockets. I use a Karbide Kutzall bit in the shape shown. I don't go real deep because I can still make some minor adjustments here if needed. I also use my 60 degree theory to line up the eyes. In the next session I'll insert the eyes and start setting them with my wood putty.
In the last picture I am satisfied with the eyes drawn in and have carved in the eye sockets.


Subscribe to:
Posts (Atom)